How to Make a Voice Memo a Ringtone: A Step-by-Step Guide

Customizing your ringtone adds a personal touch to your device, and what better way to stand out than by using a voice memo? In this guide, we’ll explore the step-by-step process of turning a memorable voice memo into a unique ringtone that reflects your individuality.
Table of Contents
ToggleWhy Customize Your Ringtone?
Your ringtone is an extension of your personality. By customizing it, you can express yourself, set a distinct tone, and stand out in a crowd. Using a voice memo adds an emotional and personal touch, making it a memorable experience.
Creating a Voice Memo on Your Device
Begin by recording a voice memo on your smartphone. Capture a snippet that holds emotional value or adds a touch of humor. Ensure clarity and audibility for the best results.
Creating a Voice Memo on Your Device: Step-by-Step Guide
For iPhone (iOS):
- Open Voice Memos App:
- Locate the Voice Memos app on your iPhone. If you can’t find it, use the search feature by swiping down on the home screen.
- Tap “Record”:
- Open the app and tap the red “Record” button. Hold your device close to your mouth for clear audio.
- Begin Recording:
- Start speaking or recording the audio you want. Ensure there’s minimal background noise for better quality.
- Tap “Stop” to End Recording:
- Once you’ve finished, tap the “Stop” button to end the recording. Your voice memo will be saved with a timestamp.
- Trim or Edit (Optional):
- If needed, you can trim or edit the voice memo. Tap the ellipsis (…) next to the recording, then select “Edit Recording” to make adjustments.
- Name Your Voice Memo:
- Give your voice memo a meaningful name by tapping “Done” and entering a title. This helps in identifying it later.
- Save or Delete:
- Choose to save or delete the voice memo based on your satisfaction with the recording.
For Android:
- Open Voice Recorder App:
- Android devices may have different pre-installed voice recorder apps. Find and open the voice recorder app on your device.
- Tap “Record”:
- Locate the “Record” button and tap it to start recording. Hold your device close to your mouth for optimal audio quality.
- Record Your Audio:
- Speak clearly or record the audio you desire. Minimize background noise for better results.
- Tap “Stop” to End Recording:
- Once done, tap the “Stop” button to end the recording. The voice memo will be saved automatically.
- Access and Edit:
- Find the recorded voice memo in the app. Depending on the app, you may have options to trim or edit the recording.
- Name Your Memo:
- Give your voice memo a name or title to easily identify it. Some apps allow you to add a title or description to your recordings.
- Save or Delete:
- Decide whether to save or delete the voice memo based on your satisfaction with the recording.
Tips:
- Use a quiet environment to record for better audio quality.
- Hold your device close to your mouth to capture clear audio.
- Test the volume levels before recording to ensure optimal sound.
These steps should guide you through creating a voice memo on both iPhone (iOS) and Android devices. Adjustments and features might vary slightly based on the specific model and operating system version.
Selecting the Perfect Voice Memo
Consider the purpose of your ringtone. Whether it’s a heartfelt message, a funny remark, or a quick note, choose a voice memo that resonates with you and suits the vibe you want.
Trimming and Editing the Voice Memo
Use the built-in tools on your device to trim and edit the selected voice memo. Keep the ringtone short and impactful to grab attention without being too intrusive.
Converting Voice Memo to a Compatible Format
Check the file format requirements for ringtones on your device. Explore user-friendly apps or tools that can convert your voice memo into a suitable format.
Transferring the Ringtone to Your Device
Transfer the customized ringtone to your device. Provide clear instructions for both iOS and Android users, ensuring inclusivity.
Below are the general steps for transferring a ringtone to your device. Keep in mind that specific steps may vary based on your device’s operating system (iOS or Android) and the method you choose for transfer.
Transferring the Ringtone to Your Device: A General Guide
1. Using USB Cable:
For Both iOS and Android:
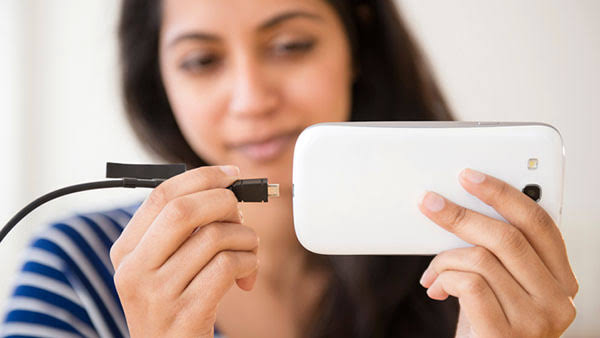
- Connect your device to your computer using the USB cable.
- On your computer, locate your device. It might appear as an external drive.
- Open the folder where you have saved your custom ringtone.
- Drag and drop the ringtone file into the designated folder on your device.
2. Email or Cloud Transfer:
For Both iOS and Android:
- Email the ringtone file to yourself.
- Open the email on your device and download the attachment.
- Alternatively, use cloud storage services like Google Drive or iCloud to upload the ringtone and download it on your device.
3. Bluetooth Transfer:
For Both iOS and Android:
- Enable Bluetooth on both your computer and your device.
- Pair the devices by following the on-screen prompts.
- On your computer, right-click on the ringtone file and select “Send To” > “Bluetooth.”
- Accept the file transfer on your device.
4. Using File Transfer Apps:
For Android:
- Download a file transfer app like “AirDroid” or “Send Anywhere” from the Google Play Store.
- Follow the app’s instructions to transfer the ringtone from your computer to your Android device.
5. iTunes (For iOS):
- Open iTunes on your computer and connect your iPhone.
- Select your device in iTunes and go to the “File Sharing” section.
- Click on the app you want to transfer the ringtone to.
- Drag and drop the ringtone file into the app’s document area.
6. Android File Transfer (For Android):
- Download and install “Android File Transfer” on your Mac or PC.
- Connect your Android device to your computer.
- Open Android File Transfer and drag the ringtone file into the desired folder on your device.
7. QR Code Scan:
For Both iOS and Android:
- Generate a QR code for your ringtone file using an online QR code generator.
- Scan the QR code with your device’s camera to download the ringtone.
8. NFC Transfer:
For Both iOS and Android:
- Ensure both devices have NFC functionality.
- Enable NFC on both devices.
- Tap the devices together to initiate the transfer.
9. Google Drive/iCloud Sync:
For Both iOS and Android:
- Upload the ringtone to Google Drive (Android) or iCloud (iOS).
- Access the respective cloud service on your device to download the ringtone.
10. Use Manufacturer’s Software:
- Some device manufacturers provide their own software for file transfers. Check for software like Samsung Smart Switch (for Samsung devices) or Finder (for recent Mac models).
Remember to check the specific requirements and compatibility of your chosen method with your device. Once the ringtone is transferred, follow the device-specific steps mentioned earlier to set it as your custom ringtone.
Setting the Customized Ringtone
Follow a step-by-step guide to set your newly created voice memo as your personalized ringtone. Include troubleshooting tips for common issues that may arise during the process.
Setting Up Your Voice Memo as a Ringtone: A Step-by-Step Guide
Step 1: Select Your Voice Memo
- Open the voice memo app on your device and choose the specific voice memo you want to set as your ringtone. Ensure it’s clear, short, and suitable for a ringtone.
Step 2: Trim and Edit (if Necessary)
- Use the built-in editing tools to trim and edit your voice memo. Keep it concise and impactful. Remove any unnecessary sections to make the ringtone engaging.
Step 3: Convert to a Compatible Format
- Check the compatible format for ringtones on your device. Use a reliable app or tool to convert your voice memo to this format. Ensure the quality remains high.
Step 4: Transfer to Your Device
- Transfer the converted ringtone to your device. You can use a USB cable, email, cloud storage, or any preferred method to move the file to your phone.
Step 5: Locate the Ringtone on Your Device
- Find the transferred ringtone in your device’s storage. It’s usually in the “Ringtones” or “Media” folder. If not, create a specific folder for easier access.
Step 6: Set as Ringtone on iPhone (iOS)
- For iPhone users, go to Settings > Sounds & Haptics > Ringtone. Find your custom ringtone in the list and select it. It’s now set as your default ringtone.
Step 7: Set as Ringtone on Android
- On Android devices, go to Settings > Sounds > Ringtone. Your custom ringtone should appear in the list of available ringtones. Select it, and it’s set.
Step 8: Test Your New Ringtone
- Make sure to test your newly set ringtone by having someone call you or using a simulator. Confirm that it plays correctly without any issues.
Step 9: Adjust Volume and Notifications
- Check the volume settings for your ringtone and adjust them accordingly. Additionally, ensure that your ringtone is selected for other notifications like messages.
Step 10: Troubleshooting (if Needed)
- If your ringtone doesn’t play as expected, revisit the steps. Confirm the file format, location, and compatibility with your device. Make any necessary adjustments.
Step 11: Enjoy Your Personalized Ringtone
- Congratulations! Your voice memo is now set as a unique and personalized ringtone. Enjoy the satisfaction of hearing a special tone that reflects your individuality.
This step-by-step guide should help you seamlessly set up your voice memo as a ringtone on both iPhone (iOS) and Android devices. If you encounter any issues, refer to the troubleshooting steps and ensure all settings are configured correctly.
Customization Options for Different Phones
Tailor the instructions for iPhone and Android users, acknowledging the variations in their processes. Ensure accessibility for a broad audience.
Tips for Creating Memorable Ringtones
Enhance the creativity of your voice memo by experimenting with different tones, styles, and emotions. Consider adding a musical touch or background sounds for a unique effect.
Sharing Your Custom Ringtone
Explore options for sharing your personalized ringtone with friends and family. Make the process social and enjoyable by exchanging unique and creative tones.
Compatibility with Different Apps and Platforms
Investigate how your customized ringtone works across various messaging apps, social media platforms, and third-party ringtone apps. Enhance the overall customization experience.
Avoiding Copyright Issues
Emphasize the importance of using original content to avoid copyright infringement. Respect intellectual property rights and encourage creativity within legal boundaries.
Benefits of Using a Voice Memo as a Ringtone
Highlight the emotional and practical benefits of having a voice memo as a ringtone. Discuss the personal connection it brings and the instant recognition it offers.
Conclusion
In conclusion, the process of making a voice memo a ringtone is a creative and personal endeavor. Follow these steps, and soon, you’ll have a unique ringtone that not only stands out but also adds a meaningful touch to your device’s soundscape.
FAQs
- Can I use any voice memo as a ringtone?
- Yes, you can use any voice memo that holds significance to you. Ensure clarity and choose a snippet that suits the purpose of your ringtone.
- Are there apps specifically for creating voice memo ringtones?
- Yes, there are apps that facilitate the conversion and customization of voice memos into ringtones. Explore options compatible with your device.
- Can I share my custom ringtone with others?
- Absolutely! Share your unique ringtone with friends and family. It adds a personal touch to your interactions and can be a fun way to connect.
- Is it legal to use a voice memo as a ringtone?
- Yes, as long as the voice memo is original content or you have the right to use it. Avoid using copyrighted material without permission.
- Can I set different ringtones for different contacts?
- Most smartphones allow you to set individual ringtones for different contacts. Check your device’s settings for customization options.


